Beekeeping Supplies Checklist Preparing for Your First Hive

Starting Beekeeping Supplies can be an exhilarating venture, yet it’s essential to approach it with proper preparation.
A comprehensive beekeeping supplies checklist serves as the backbone of this preparation, ensuring that newcomers are equipped with everything necessary to maintain a thriving hive. A checklist provides clarity and organization in your initial steps. Without it, one might overlook crucial items, which could lead to challenges down the road. Here are some key benefits of having a checklist:
- Prevents Oversights: It helps you avoid missing essential tools and supplies that you will need during your beekeeping journey.
- Saves Time: Having a clear list allows for efficient shopping and preparation, reducing the time spent guessing what is required.
- Budgeting: Understanding what you need helps in setting an accurate budget and avoiding unnecessary purchases.
Preparing this checklist not only establishes a strong foundation for your first hive but also significantly reduces the anxiety associated with starting a new hobby.
Benefits of Preparing for Your First Hive
Taking the time to prepare thoroughly for your first hive reaps numerous advantages, as it enables aspiring beekeepers to set realistic expectations. Here are some notable benefits:
- Confidence Boost: Familiarizing yourself with the necessary supplies and equipment instills a sense of confidence. You will feel more at ease when handling your bees.
- Understanding Bee Behavior: Preparation allows you to study bee biology, communication, and lifecycle. This knowledge enhances your interaction with the bees, leading to better management practices.
- Informs Decisions: Knowing the requirements helps you make informed decisions, such as the type of hive to choose and the best location for it, considering factors like sunlight and accessibility.
- Minimizes Stress: By being well-prepared, you reduce the inevitable stress that comes with starting anything new. Instead of feeling overwhelmed, you can focus on nurturing and enjoying your bees.
Overall, having a beekeeping supplies checklist and preparing for your first hive lays the groundwork for a rewarding beekeeping experience, allowing you to grow as a beekeeper while ensuring the health and productivity of your bees.
Contents
Essential Beekeeping Tools
As an aspiring beekeeper, familiarizing yourself with essential tools is crucial to your success. The right equipment not only simplifies hive management but also ensures the safety and well-being of both the bees and the beekeeper. Here are two fundamental tools every beekeeper should have in their arsenal.
Hive Tool
The hive tool is arguably the most vital piece of equipment in any beekeeper’s toolkit. This multifunctional instrument assists in various tasks involved in hive management, especially when it comes to inspecting and maintaining the beehive. Key Functions of a Hive Tool:
- Prizing Open Frames: The hive tool helps lift and remove frames easily, which is essential during hive inspections.
- Scraping: Beekeepers can use it to scrape off excess propolis— a sticky substance bees use to seal gaps in the hive, ensuring a clean working environment.
- Removing Dead Bees: The tool aids in the removal of dead bees or debris from the bottom of the hive, promoting a healthy living space for the colony.
- Unclogging: It can help clear entrances or narrow passages within the hive that may be obstructed.
When selecting a hive tool, consider opting for one with a sturdy handle and a flat, pointed end to maximize efficiency.
Bee Brush
A bee brush is another essential tool that allows beekeepers to handle bees gently without harming or agitating them. Made predominantly from soft bristles, it’s specifically designed to encourage bees to move smoothly without resorting to squishing them. Benefits of Using a Bee Brush:
- Gentle Handling: The soft bristles allow for a gentle touch, making it easier to remove bees from frames or hive openings without causing distress.
- Versatile Use: Beekeepers can utilize a bee brush during inspections or honey harvesting to clear bees from frames, promoting a safer working environment.
- Queen Protection: By delicately removing bees, you reduce the risk of accidentally harming the queen bee during inspections.
Having both a hive tool and a bee brush readily accessible is vital for effective beekeeping. These tools help ensure that the experience is straightforward, safe, and beneficial for both the beekeeper and the hive. By investing in quality equipment, you pave the way for a successful and enjoyable beekeeping journey.
Protective Gear
When stepping into the captivating world of beekeeping, ensuring personal safety should be a top priority. Protective gear not only safeguards against bee stings but also provides peace of mind while managing hives. Two key components of the protective gear ensemble are the beekeeping veil and the beekeeping suit.
Beekeeping Veil
A beekeeping veil is an essential piece of equipment designed to protect your face and neck from bee stings while allowing for optimal visibility and airflow. Key Features of a Beekeeping Veil:
- Visibility: Most veils come with mesh fabric that allows for clear vision while you work, ensuring you can see what you need without obstruction.
- Comfort: Many veils feature a softer, breathable material, offering comfort during warm days at the apiary.
- Varieties: Beekeeping veils come in various styles, including:
- Attached Veils: Often integrated with jackets or suits, providing seamless protection.
- Detached Veils: Can be worn with any clothing, offering flexibility in choice.
Tips for Use:
- Ensure that your veil fits snugly around the collar of your suit or jacket to prevent any bees from sneaking in.
- Regularly inspect your veil for tears or holes, as bees can easily find their way through any gaps.
Beekeeping Suit
A beekeeping suit provides an all-encompassing layer of protection against bee stings, covering your entire body. It’s an indispensable investment for both beginner and seasoned beekeepers. Benefits of a Beekeeping Suit:
- Full Coverage: The suit covers arms, legs, and torso, ensuring minimal skin exposure and lowering the chances of being stung.
- Breathable Material: Many suits are made from lightweight, breathable fabric, making them comfortable even during the heat of summer.
- Zippered Openings: Look for suits with secure zippered openings, allowing for easy removal and access while minimizing potential entry points for bees.
Choosing the Right Suit:
- Ensure the suit fits correctly; it should be snug enough to prevent bees from entering but also offer enough room for comfortable movement.
- Opt for a suit with elastic cuffs and ankles to provide extra security against wandering bees.
In summary, equipping yourself with a beekeeping veil and suit is vital for safety and comfort as you embark on your beekeeping journey. These pieces of protective gear facilitate a pleasant beekeeping experience, allowing you to focus on fostering a healthy hive.
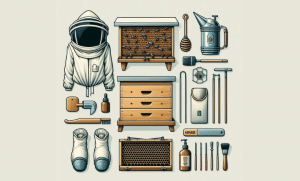
Hive Components
Understanding the various components of a beehive is crucial for any aspiring beekeeper. The right setup not only encourages healthy bee colonies but also facilitates easy management and honey production. Two of the fundamental parts of every beehive are the beehive boxes and the frames and foundation.
Beehive Boxes
Beehive boxes serve as the living quarters for your bee colony. They come in various shapes and sizes, allowing beekeepers to choose what best suits their goals and field conditions. Types of Beehive Boxes:
- Langstroth Hive Boxes: The most common design, featuring removable frames that make inspections easier. They generally consist of Deep, Medium, and Shallow boxes, each serving specific purposes:
- Deep boxes: Used for brood (where bees are raised) and can hold a large number of frames.
- Medium and Shallow boxes: Often used for honey storage, these require less lifting, making them suitable for novice beekeepers.
- Top-Bar Hives: More natural in design, these encourage bees to build their comb without using frames, promoting a more natural beekeeping experience.
- Warre Hives: Developed in France, these vertical hives mimic the natural nesting habits of bees and can be easier to manage for beginner beekeepers.
When selecting a beehive box, consider factors such as climate, bee species, and your personal management style.
Frames and Foundation
Frames and foundation are critical for organizing the beehive’s interior and providing a structure for bees to build their comb. Frames:
- Purpose: Frames insert into the beehive boxes and hold the foundation, which serves as a base for bees to build their wax comb.
- Materials: Frames are typically made from wood, although plastic options are also available for durability and ease of cleaning.
Foundation:
- Wax Foundation: Traditionally, this is made from beeswax and imprinted with hexagonal cells, guiding bees in comb construction.
- Plastic Foundation: This modern alternative provides a more uniform structure and is often easier to maintain. It typically uses a stamped wax surface to encourage bees to draw out the comb.
In summary, understanding the components of your hive, particularly the beehive boxes and the frames with foundation, equips you for effective hive management. These elements create a stable environment for bees to flourish, operate smoothly, and ultimately lead to bountiful honey production. As you embark on your beekeeping journey, investing in quality components will significantly influence your experience and success.
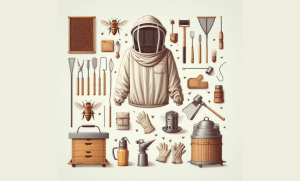
Handling Equipment
In the fascinating world of beekeeping, properly handling bees and their products is key to ensuring the health of the colony and maximizing honey harvests. Two critical pieces of handling equipment that every beekeeper should have are the smoker and the uncapping knife.
Smoker
The hive smoker is an essential tool for any beekeeper, serving a crucial purpose during hive inspections and maintenance. This device produces smoke that calms bees, allowing you to work with them more safely and effectively. Benefits of Using a Smoker:
- Calming Effect: Smoke triggers a natural response in bees, prompting them to consume honey in preparation for a possible hive evacuation. This behavior makes them less likely to sting.
- Control: The use of a smoker aids in gaining control over the bees, allowing the beekeeper to inspect frames without alarming them.
How to Use a Smoker:
- Fuel Selection: Use appropriate fuel such as wood chips, pine needles, or burlap. Avoid any materials that produce toxic fumes.
- Puffing Technique: Gently puff smoke into the hive entrance and around the frames, ensuring you do not over-smoke, as excessive smoke can distress the bees.
Utilizing a smoker is critical for creating a safe working environment in the hive, allowing beekeepers to manage their colonies more effectively.
Uncapping Knife
The uncapping knife is a specialized tool used during the honey harvesting process. It plays a vital role in preparing honeycomb frames for extraction by removing the wax caps that seal honey cells. Key Features of an Uncapping Knife:
- Design: Most uncapping knives are flat and heated to make the uncapping process efficient and clean. They come in electric and non-electric (manual) varieties.
- Efficiency: The heated blade allows for swift and precise removal of wax caps, reducing the amount of honey left in the comb and maximizing harvest yields.
Using an Uncapping Knife:
- Heating: If using a heated knife, ensure it’s hot enough to melt the wax cap without damaging the comb structure.
- Technique: Run the knife along the top of the comb cells to remove the wax caps, making sure to do so with a steady, gentle hand to maintain the integrity of the honeycomb.
By possessing and mastering the use of a smoker and an uncapping knife, beekeepers can significantly enhance their hive management practices and ensure a productive and enjoyable honey harvesting experience. These tools are foundational to handling bees and honey, empowering you to become a confident and effective beekeeper.
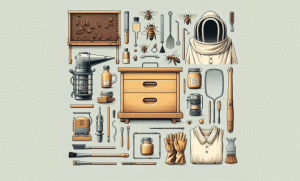
Additional Supplies
As beekeepers progress in their journey, certain additional supplies become invaluable for supporting the health of their bees and optimizing honey production. Among the most critical of these supplies are the feeder and the queen excluder.
Feeder
A feeder is an essential item for any beekeeper, especially during periods of scarcity when natural food sources for bees may be limited. This device allows beekeepers to supplement their colonies with sugar syrup or other nutritional substances. Types of Beekeeping Feeders:
- Entrance Feeders: These are placed at the entrance of the hive and allow bees to access the feed directly from outside. They are easy to use and monitor.
- Frame Feeders: These feed containers fit directly into the hive frame, allowing bees to access food while being protected from the environment.
- Top Feeders: Installed on top of the hive, these feeders can hold larger amounts of syrup, commonly used during winter feeding.
Benefits of Using a Feeder:
- Supports Colonies in Spring: They help boost bee populations by providing nourishment as the colony starts to grow.
- Prepares Colonies for Winter: Feeding bees in the fall ensures they have enough stores to survive the colder months.
Using a feeder effectively can make a significant difference in a colony’s overall health and productivity.
Queen Excluder
The queen excluder is a crucial tool for beekeepers who wish to control the movement of their queen bee within the hive. This device features a grid structure that allows worker bees to pass through while preventing the larger queen from entering specific sections of the hive. Key Functions of a Queen Excluder:
- Honey Harvesting: By keeping the queen out of honey supers, beekeepers can ensure that the honey produced is free from brood and helps maintain the quality of the harvest.
- Brood Management: The queen excluder allows beekeepers to regulate where the queen lays eggs, enabling better management of brood and honey production.
Tips for Using a Queen Excluder:
- Careful Placement: Always place the excluder above the brood chamber and below the honey supers to guide the bees effectively.
- Regular Checks: Be sure to monitor the excluder for blockages caused by propolis, as this can hinder bee movement.
In summary, incorporating additional supplies like feeders and queen excluders into your beekeeping toolkit enhances both the management and productivity of your hive. These tools play crucial roles in ensuring a healthy and thriving bee population, ultimately leading to a successful beekeeping experience.
As with any rewarding endeavor, meticulous preparation is paramount in beekeeping. The journey from curious novice to confident beekeeper involves many steps, all of which contribute to the overall success of managing your first hive.
Importance of Being Well-Prepared
Being well-prepared is not just about having the right tools and equipment; it also encompasses understanding bee behavior, hive dynamics, and the necessary seasonal management practices. Here are key reasons why preparation matters:
- Knowledge Base: Familiarizing yourself with the lifecycle of bees, their roles, and how they communicate allows for informed decision-making.
- Resource Management: Knowing what supplies you need—such as feeders, hives, and protective gear—prevents last-minute chaos and ensures everything is on hand.
- Informed Choices: Understanding the various types of hives available, and selecting the one that works best for your goals, is a crucial aspect of starting on the right foot.
Preparation leads to confidence. When you are armed with knowledge and tools, every interaction with your hive becomes more productive and less daunting.
Ensuring a Successful First Hive
Your first hive can be a remarkable experience filled with learning and growth. To ensure it thrives, consider the following strategies:
- Regular Inspections: Monitoring your bees frequently allows you to catch potential issues early, such as diseases or lack of resources.
- Nutritional Support: Use feeders effectively to supplement your bees, especially during transitional seasons or when natural forage is scarce.
- Adaptation: Be open to change and willing to adapt your strategies as you learn more about your bees and their behaviors.
Moreover, surrounding yourself with a supportive community, whether through local beekeeping clubs or online forums, enriches your experience. Interacting with experienced beekeepers provides invaluable advice and encourages continuous learning. In conclusion, embarking on the path of beekeeping is both an art and a science. By being well-prepared and knowledgeable, you pave the way for a healthy first hive that will not only produce honey but also contribute to the well-being of local ecosystems. Embrace this journey, and it is sure to yield abundant rewards both in sweet honey and in the joy of observing bee life.
How do you prepare a new beehive?
Preparing a new beehive involves a series of thoughtful steps designed to create a safe and comfortable environment for your bees. Proper preparation not only aids in establishing a thriving colony but also equips you, the beekeeper, for successful management. Here’s a comprehensive guide to get you started on your beekeeping journey.
1. Select the Right Location
Finding an optimal space for your beehive is crucial. Consider the following factors:
- Sunlight: Choose a location that receives ample sunlight, as bees thrive in warm conditions.
- Wind Protection: Ensure the site is shielded from strong winds to prevent temperature fluctuations within the hive.
- Accessibility: The site should be easily accessible for regular inspections and maintenance.
2. Choose Your Beehive Type
Before purchasing a beehive, explore the different types available, such as:
- Langstroth Hives: Ideal for beginners, these feature removable frames for easy inspections.
- Top-Bar Hives: Designed for a more natural approach, they allow bees to build comb without frames.
- Warre Hives: These vertical hives are user-friendly and mimic the bees’ natural nesting behavior.
Select a style that fits your management preferences and comfort level.
3. Assemble and Prepare Your Hive
Once you have your hive, it’s time to set it up:
- Assemble the Hive: Follow the manufacturer’s instructions to assemble the hive boxes and frames.
- Paint or Stain: If desired, use a non-toxic paint or stain to provide protection against the elements while keeping the internal structure clean.
4. Install Frames and Foundation
- Insert Frames: Place frames with foundation into the hive boxes. This supports the bees as they begin to build their comb.
5. Obtain Your Bees
You can source bees through:
- Packages: Usually consist of a queen and several worker bees.
- Nucs: A small colony with frames of brood and honey.
- Swarm Capture: Capturing a wild swarm can also be an option, though it requires experience and caution.
6. Monitor and Maintain Your Hive
After installation, observe your bees closely:
- Regularly inspect for signs of disease, pests, or queen health.
- Ensure your bees have enough food, especially during the early stages or adverse weather.
In conclusion, preparing a new beehive involves careful planning and attention to detail. By establishing the right environment and understanding the types of hives and bee acquisition methods, you lay a strong foundation for a successful beekeeping experience. This meticulous approach ensures your bees flourish, contributing positively to the ecosystem and providing you with the sweet rewards of honey.
When should I do my first hive check?
The timing of your first hive inspection is crucial for the success of your beekeeping endeavor. Performing this initial check at the right moment ensures that you can assess the health of your bees, confirming they have settled into their new home effectively.
Timing for the First Inspection
Typically, the first hive inspection should take place about one week after you have installed your package bees. This timeframe allows the bees to acclimate to their new environment while giving you enough insight into their behavior and adjustment. Key Reasons for Waiting One Week:
- Queen Acceptance: This period allows time for the workers to accept their queen. They need to recognize her pheromones and start fostering a cohesive colony.
- Foundation Drawing: A week provides enough time for the bees to begin drawing out the foundation that you’ve provided, which is essential for their brood and honey storage.
Preparing for the First Check
Before conducting the inspection, preparation is paramount. Follow these steps to ensure a smooth experience:
- Protective Clothing: Wear appropriate protective gear, even if you feel confident in handling bees. It’s better to err on the side of caution during your initial checks.
- Gather Tools: Ensure that your hive tool, smoker, and fuel are at the ready. The smoker will help calm the bees, making your inspection safer for you and more comfortable for the bees.
- Choose the Right Time: Schedule your inspection during a warm, sunny day when bees are actively foraging. This increases the likelihood that the majority of bees will be away from the hive, providing easier access for your check.
What to Look For
During your first hive inspection, focus on these critical aspects:
- Queen Status: Confirm that the queen is present and has been accepted by the worker bees.
- Foundation Progress: Check if the bees have started drawing out the foundation; this indicates active, healthy behavior.
- Brood Patterns: Look for signs of brood, which indicates that the queen is laying eggs.
In conclusion, conducting your first hive inspection about a week after installing your package bees is essential for a thriving colony. By preparing adequately and knowing what to look for, you can ensure that your beekeeping journey begins on a positive note. Observing your bees’ progress during the initial check not only fosters confidence but sets the stage for effective management throughout the seasons.
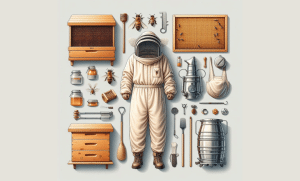
What Beekeeping Equipment Do I Need?
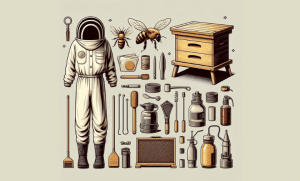
Entering the world of beekeeping requires equipping yourself with essential tools and supplies to ensure a smooth and successful start. Whether you are a complete novice or have some experience, having the right equipment can enhance your hive management and make the entire process much more enjoyable. Below is a breakdown of the key beekeeping equipment you’ll need.
1. Hive Tool
The hive tool is one of the most critical pieces of equipment every beekeeper should possess.
- Functionality: It assists in accessing the hive by prying open frames and scraping off excess propolis and wax.
- Varieties: Common types include the standard hive tool with a flat and curved end and the capping scraper, which helps when harvesting honey.
2. Smoker
A smoker is essential for maintaining a calm environment during hive inspections.
- Calming Effect: Smoke soothes bees, reducing the likelihood of defensive behavior.
- Fuel Types: You can use various fuels such as wood chips, dry leaves, or burlap.
3. Protective Clothing
Your safety is paramount when working with bees. Having proper protective gear minimizes the risk of stings.
- Beekeeping Suit: A full-body suit provides comprehensive protection against bee stings.
- Veil and Gloves: Be sure to equip yourself with a veil for face protection and gloves for your hands.
4. Beekeeping Tool Box
Having a designated tool box helps keep your beekeeping supplies organized.
- Storage: It’s a convenient way to keep all your tools in one place, ensuring you have quick access during hive checks.
5. Bee Brush
The bee brush is a gentle tool used to move bees away from frames or surfaces without harming them.
- Soft Bristles: A brush with soft bristles minimizes distress to the bees during inspections.
6. Frame Holder
A frame holder or perch is a useful accessory during inspections.
- Convenience: It allows you to rest frames safely while examining other parts of the hive.
7. Beginner Beekeeping Kits
Consider purchasing a starter kit specifically designed for beginners.
- Comprehensive Supplies: These kits often include many of the essential tools mentioned above, allowing you to begin your journey without needing to source each item individually.
In summary, having the right beekeeping equipment is vital to ensure that you enter the beekeeping arena adequately prepared. With tools such as a hive tool, smoker, protective gear, and the convenience of beginner kits, you will be well-equipped to start managing your hive effectively and safely. This careful preparation is fundamental to a successful beekeeping experience.
Can I Take Honey from a First Year Hive?
As a new beekeeper, one of the most common questions is whether honey can be harvested from a hive during its first year. While the prospect of sweet, golden honey is undoubtedly enticing, it’s important to exercise caution and prudence in this early stage of beekeeping.
Understanding the First Year Challenges
During the first year, the primary focus should be on establishing a healthy and strong bee colony.
- Colony Health: If the colony does not remain healthy, your experience with the bees can quickly become difficult and stressful. A robust hive is crucial for honey production.
- Resources for Survival: Bees need to build their reserves to survive the winter. Harvesting honey too early can deplete their food supply.
The Risks of Honey Harvesting in Year One
Harvesting honey in the first year poses several risks which may compromise the colony’s survival.
- Insufficient Stores: If you take too much honey, your bees may not have enough resources to sustain themselves, especially during colder months when foraging is not possible.
- Inexperienced Management: New beekeepers may not yet be skilled at managing reserves properly, leading to potential starvation of the colony.
Recommendations for New Beekeepers
Given the risks associated with honey harvesting in the first year, many experienced beekeepers offer the following recommendations:
- Avoid Honey Harvesting: It is often advised not to harvest any honey from your beehive during your first year. This precaution helps protect the bees by ensuring they have ample resources to survive.
- Focus on Strong Colonies: Concentrate on developing a strong hive. Your primary goal should be ensuring the queen is healthy and that the colony is thriving.
Future Considerations
As your beekeeping experience grows:
- Monitor Your Hive: Keep a close eye on honey production and colony health in subsequent years. Once you’re comfortable with hive management, you can consider harvesting honey.
- Educate Yourself: Engage with local beekeeping groups or resources to gain insights into when it is appropriate to harvest honey without endangering the hive.
In conclusion, while the idea of harvesting honey from your first-year hive is tempting, it is essential to prioritize the health of your colony. Focus on building strong and well-maintained hives, which will pave the way for a successful honey harvest in the years to come. By respecting this initial timeframe, you set the foundation for a productive and rewarding beekeeping journey.
As we wrap up our Beekeeping Supplies Checklist, I hope you now feel equipped and inspired to embark on your beekeeping journey. From selecting the right hive to understanding the crucial tools and equipment you’ll need, preparation is key to ensuring a healthy and thriving apiary.
I’d love to hear your thoughts! What are you most excited about regarding your first beehive? Are there specific challenges you anticipate, or questions about beekeeping supplies that are still on your mind? Share your insights in the comments below, and let’s cultivate this community together as we support one another in this buzzing adventure!
Important Notice on Content Rights
All rights reserved to Bees Partners © 2025. Copying, republishing, translating, or quoting more than 10% of this content is prohibited without prior written permission. For commercial or academic use, please contact: info@beespartners.dk.
Note: Limited quotation is allowed with clear source attribution and a direct link to the original article.
